Install Swipe asset on live theme
To implement the Swipe asset on your Live theme, follow the same steps as above:
-
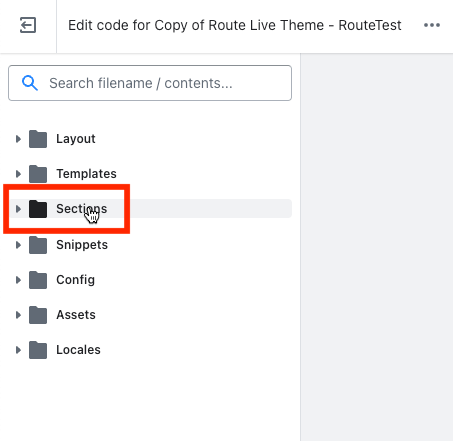
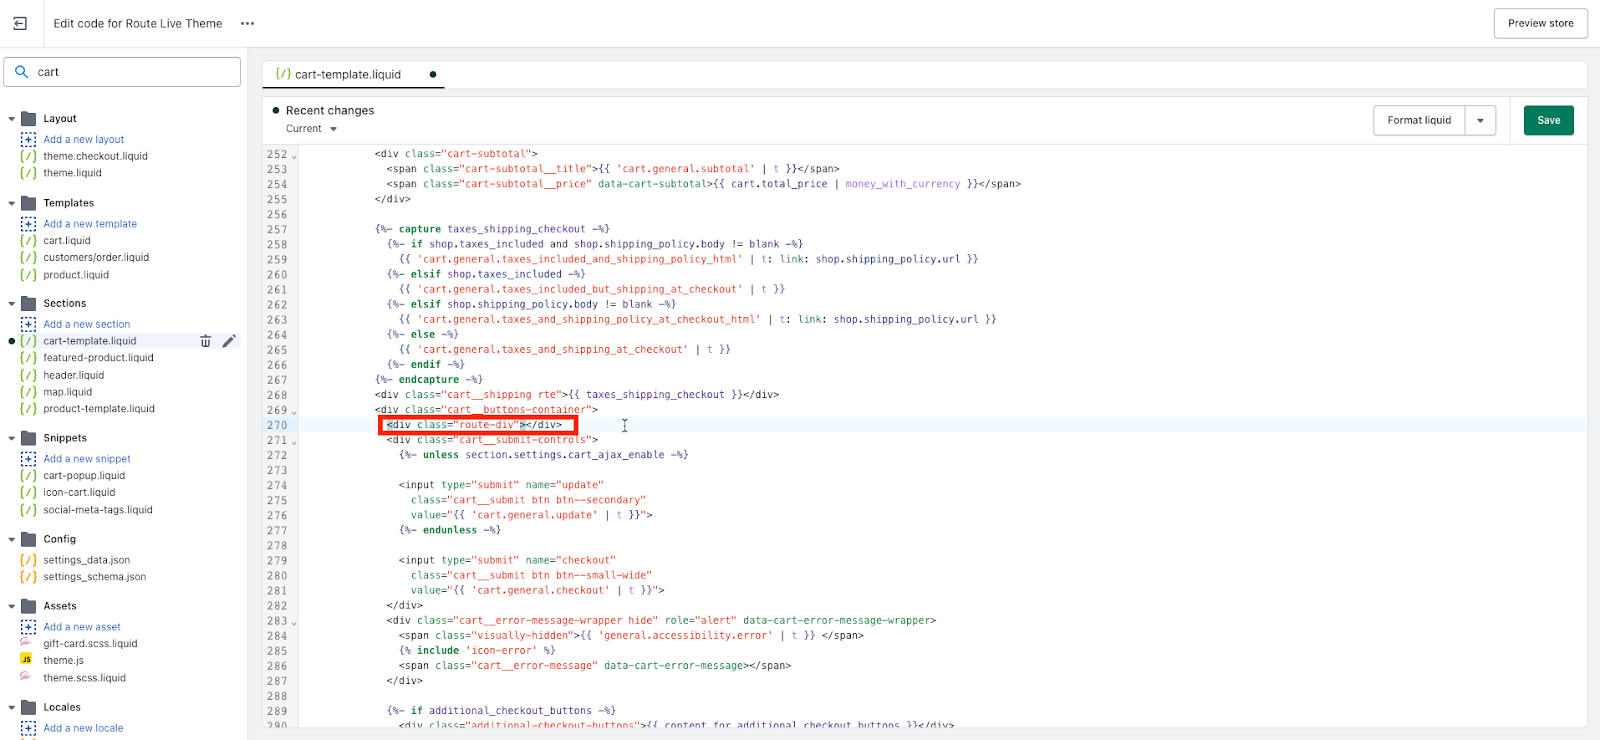
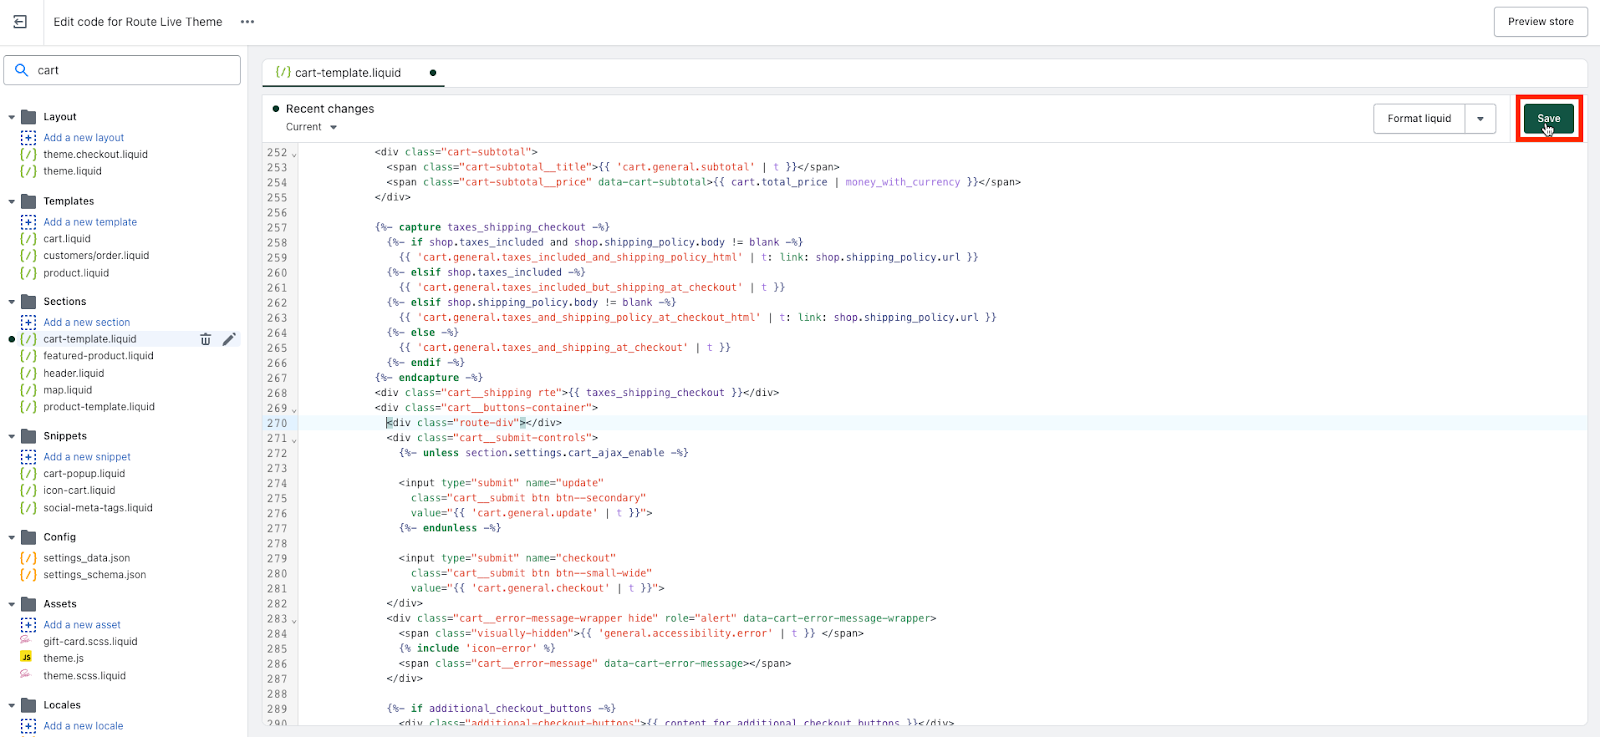
On the live theme, click Actions > Edit code.
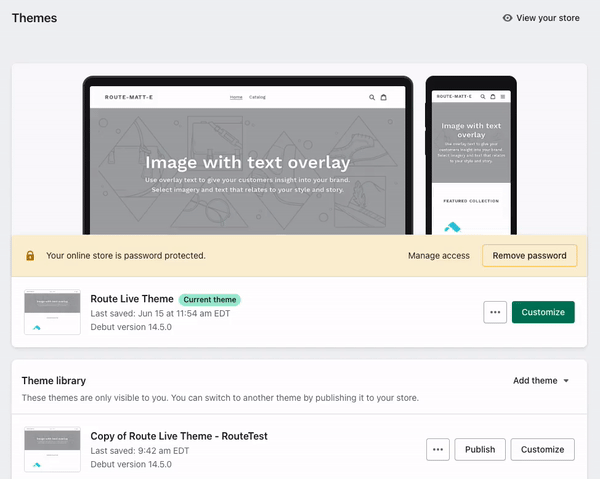
Choose the same theme file(s) from the test theme.
In the file, search for the line of code that matches where you placed the code on the test theme.
-
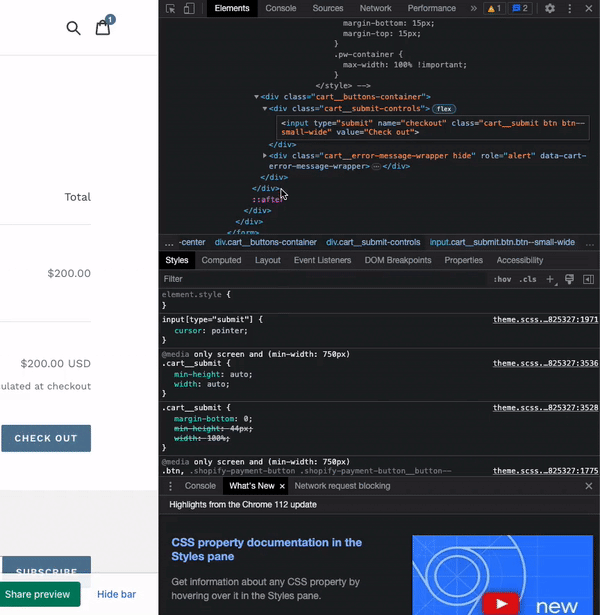
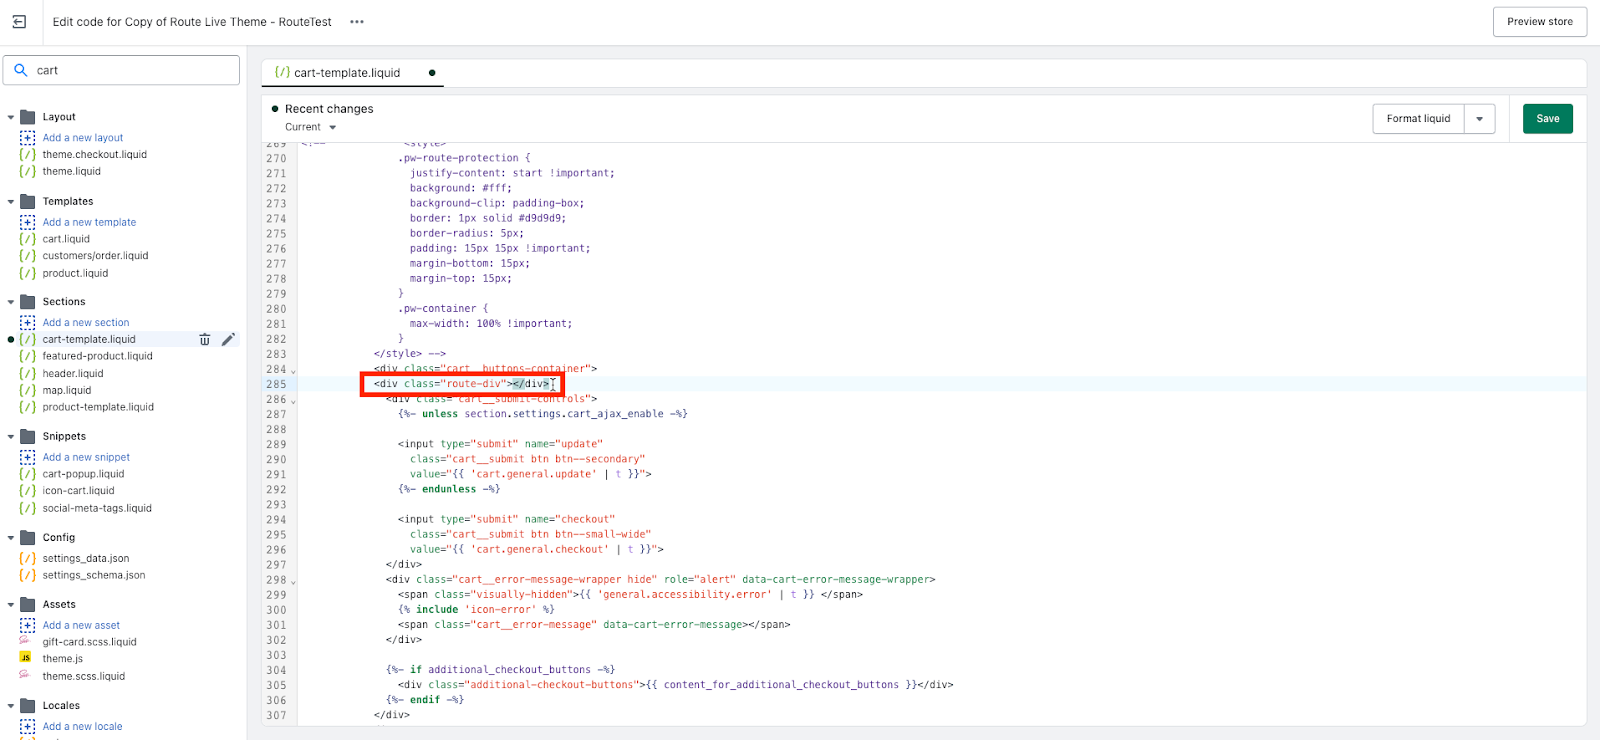
Once you find the line of code to place the Swipe div code above, click on the line above it, press enter/return and insert the div code <div class="Swipe-div"></div>.
-
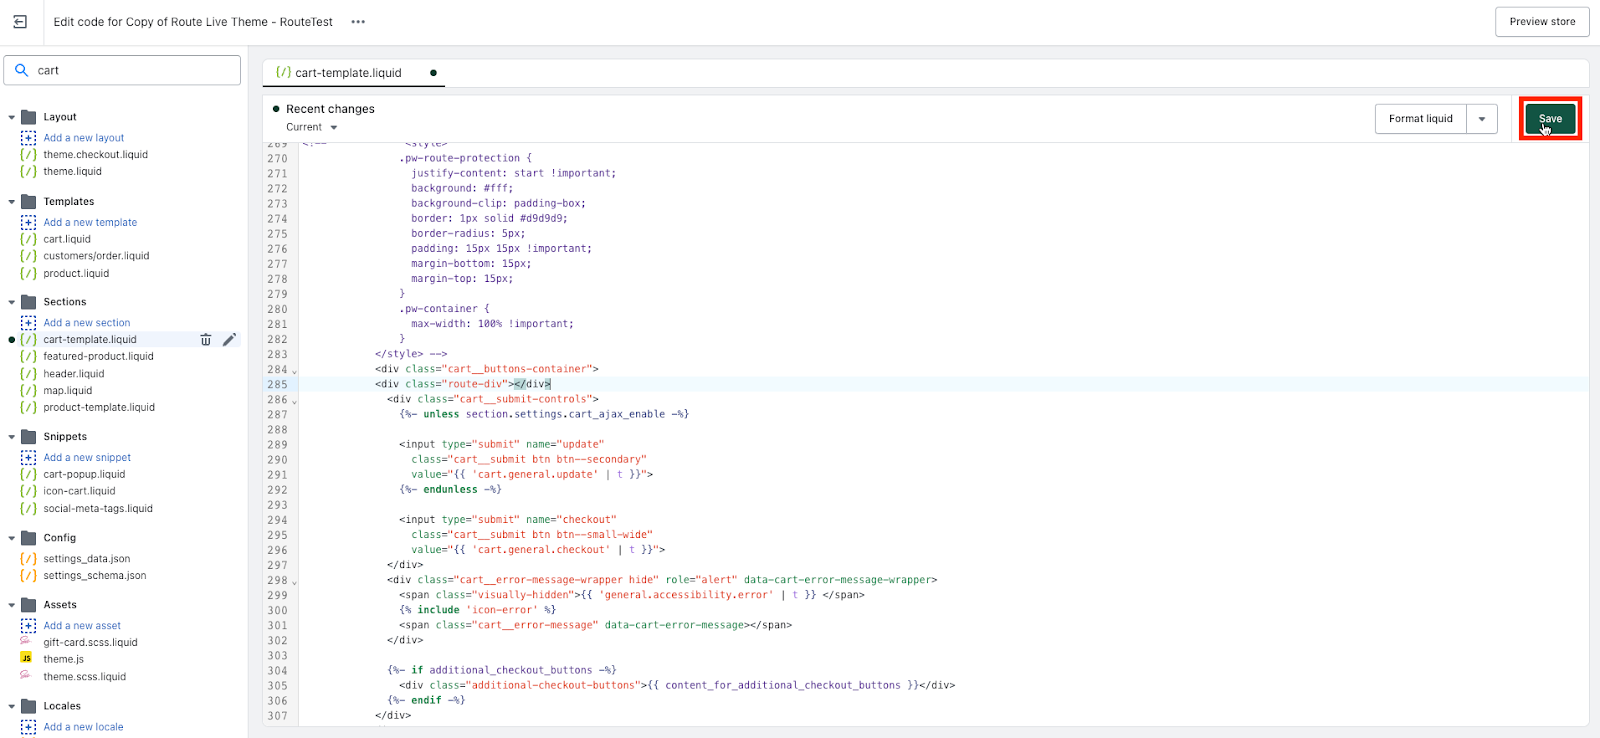
Click Save at the top right.
-
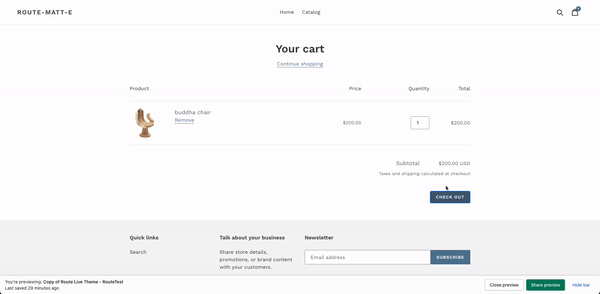
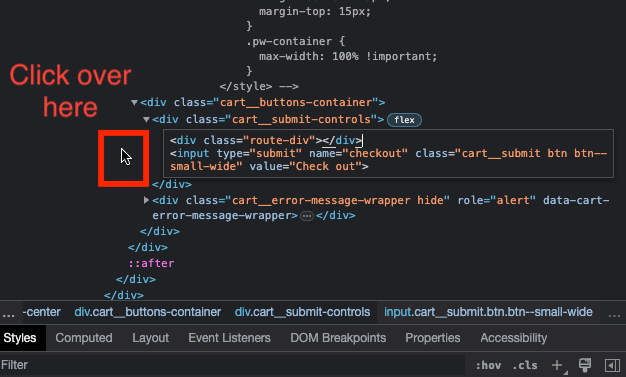
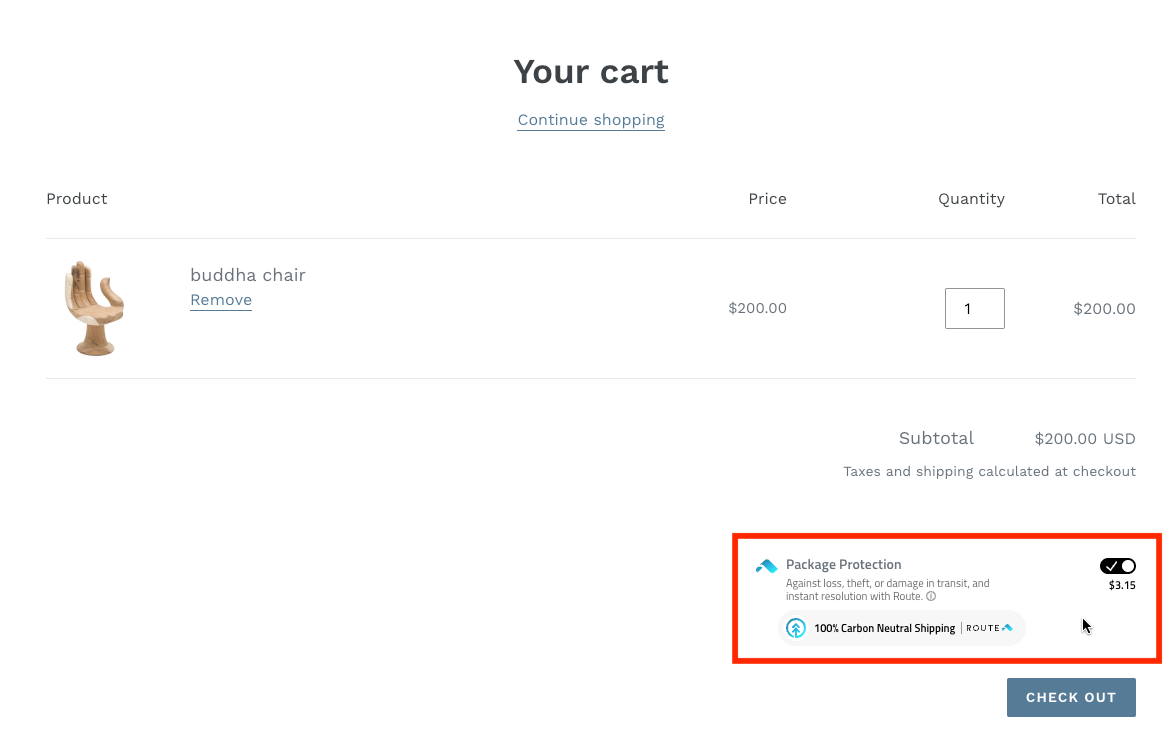
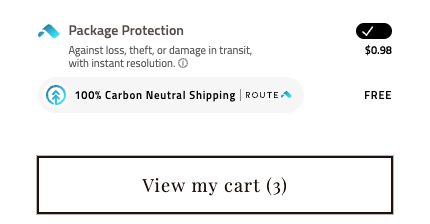
Open the Preview in Google Chrome's incognito mode and test the cart to see if the Swipe asset appears in the designated cart location.
-
Add an item to your cart and proceed to checkout. In the checkout, keep the Swipe asset toggled and proceed to the payment page to see if the Swipe product appears as a line item in the order summary.

Go back to the cart and de-select the Swipe asset and proceed to the payment page to ensure the Swipe product doesn't show as a line item.
Success
The Swipe asset is now live on your site!
Running into issues? Please feel free to reach out to our tech support via this form
Appendix
1. CSS Styling Issues
If you are seeing issues with overlapping in the carbon pill and/or elements of the Swipe widget not looking correctly, it is most likely due to theme/site CSS being used that is conflicting with the elements of the Swipe widget. To combat this, you should create new CSS to target elements within the Swipe widget to fix said issues. This help center article may also assist in identifying other “troubleshooting” issues: https://merchants.help.Swipe.com/hc/en-us/articles/360047724593-Shopify-Self-Install-Troubleshooting-FAQ.
Example:
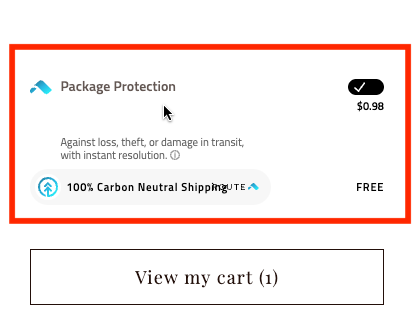
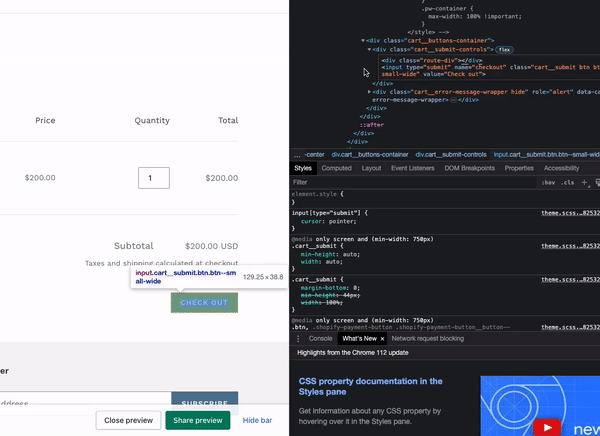
Description: There is an increased amount of space from the Swipe widget title as well as overlapping in the carbon pill
Fix here:
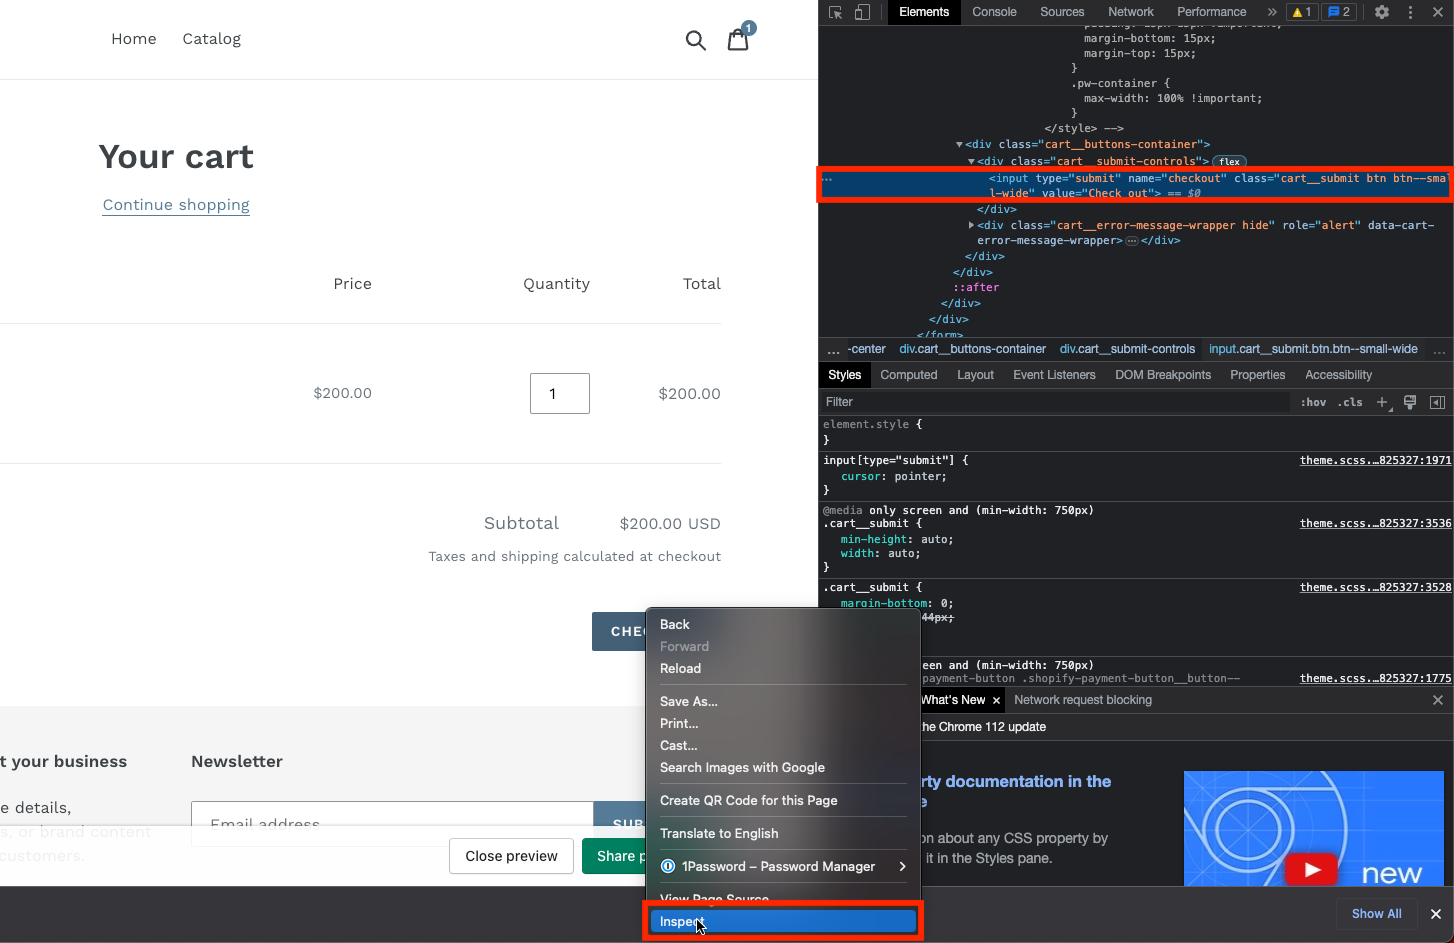
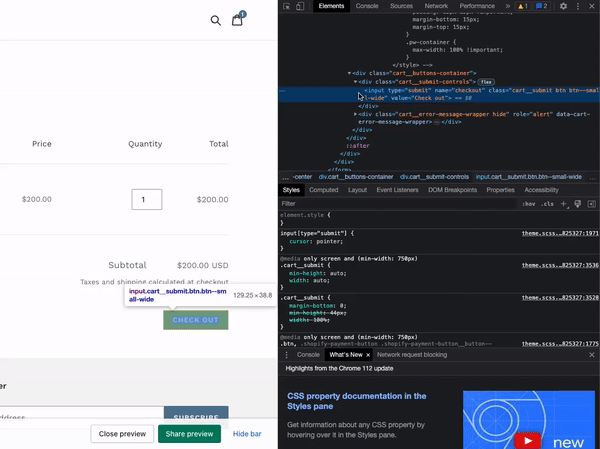
Right click on the Swipe widget and select inspect. From there, go to elements and look for the different element class names associated with the Swipe widget.
For the title issue, you will see the class name associated with it is “title-wrapper”. When looking at the “styles” you will see a separate CSS code that is creating an increased margin underneath any class name with “title-wrapper".
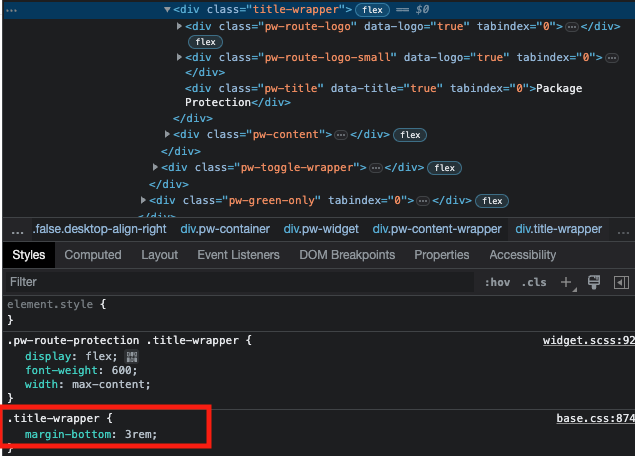
You will need to add CSS targeting just the Swipe widget “title-wrapper” and remove the bottom margin.
Code should look like this for doing that:
.pw-Swipe-protection .title-wrapper{
margin-bottom: 0px !important;
}
For the carbon pill overlapping issue, sometimes it is hard to identify the CSS affecting the element class. In this instance the code to fix the issue would be the following:
pw-Swipe-protection .pw-green .vertical-bar {
display: inherit;
margin-left: 24px;
}
There were some styles causing an issue with how the vertical bar was displayed as well as we needed to increase the overall alignment of the vertical bar and push it to the right to prevent the overlap.
After the above fixes, the widget should look fine now:
Note
Not every fix will be as this example, but this gives a good basis on what would need to be done with identifying Swipe widget class names and creating CSS to fix styling issues.
2. Downloading a Shopify File Searcher Chrome plugin
Sometimes it is hard to determine what exact file corresponds to the cart pages identified in your testing to add Swipe. We recommend installing a File Searcher that allows you to easily search through all of your Shopify theme files (includes the ability to copy and paste exact class name elements for checkout buttons in the search bar of the theme). The File Searcher we recommend is the following on Google Chrome: https://chrome.google.com/webstore/detail/liquify-shopify-code-sear/edekihmjmpkkkaolmojnajojfgphccma.
Example:
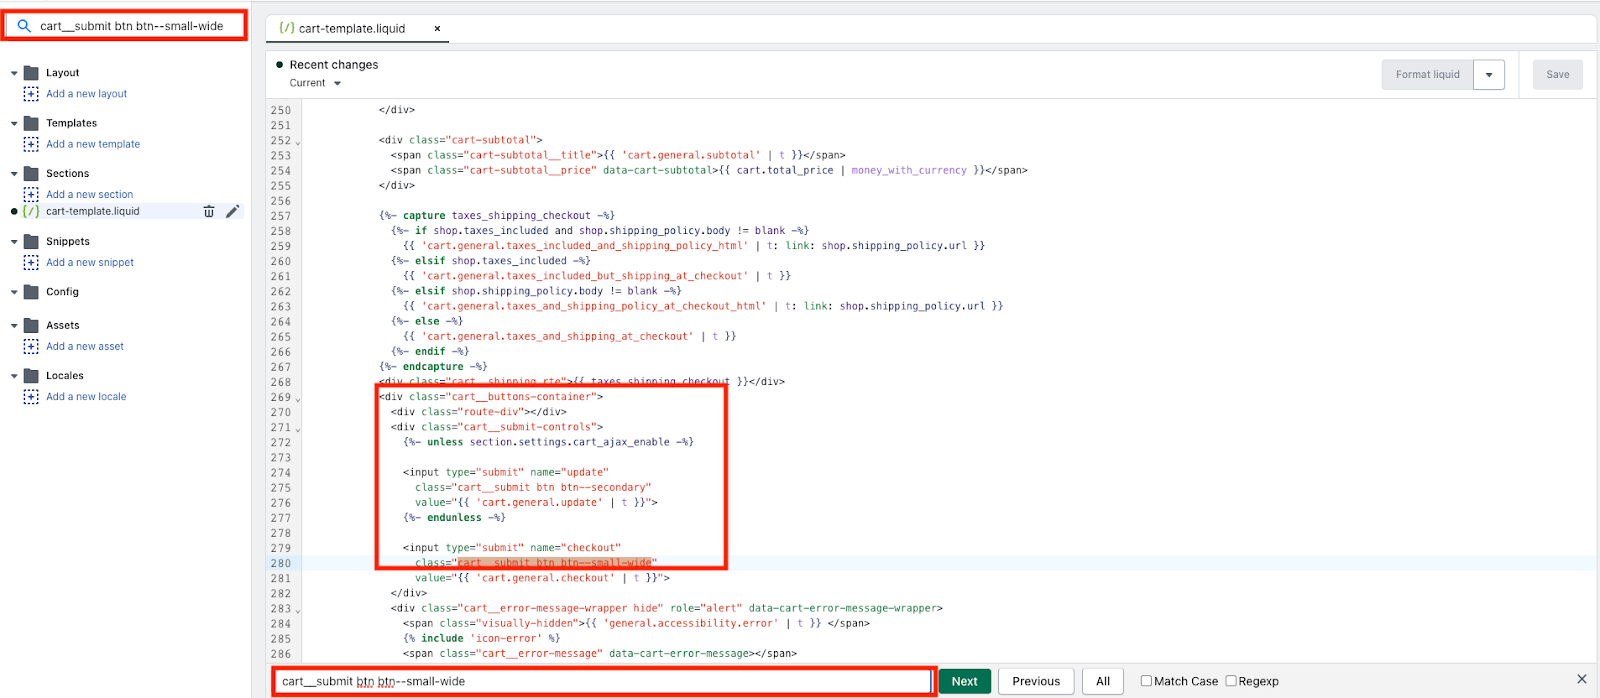
Description: From inspecting the page during testing you can copy the class name related to the checkout button. You can then paste that class name in the search bar in the top left corner of the theme you are working on and it will pop up all “files” in the left-hand side that contains that class name (in this case only one file appears making things easier). You can then search again in the file for the same class name and it will highlight it in the code. Then from your notes of where you added Swipe in your testing, you can then add the Swipe div code there. Overall, using a file searcher makes identifying the correct file to add Swipe to a lot easier.
3. Most Common Basic Shopify Themes to implement Swipe onto
a. “Dawn-like” Themes
Dawn, Craft, Refresh, and Studio are 4 examples of themes that share the same look and feel as well as have similar theme file names. There may be more that fall in this bucket, but the above are the 4 most common “Dawn-like” themes. Usually they contain a cart page and a header cart, but some merchants like to add a drawer cart instead of a header cart here.
b. Symmetry, Impulse, and Debut
Usually just a cart page but can contain either a header cart or drawer cart as well.
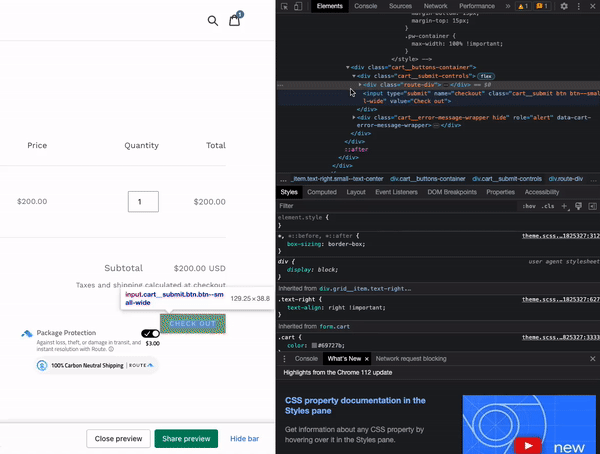
c. Example of “Dawn” Implementation
Description: Almost all “Dawn-like” themes will utilize a cart page and a header cart and this example will assume both are being used. Sometimes the Swipe code requires “attributes” we have created to fix certain issues. All “Dawn-like” themes that utilize a cart and header cart with the files “main-cart-footer.liquid” for the cart page and “cart-notification.liquid” for the header cart will need the attributes shown in this example to work properly. If you add the code as shown below, then Swipe will appear and be working as intended on both the cart page and header cart.
Cart Page (“main-cart-footer.liquid”)
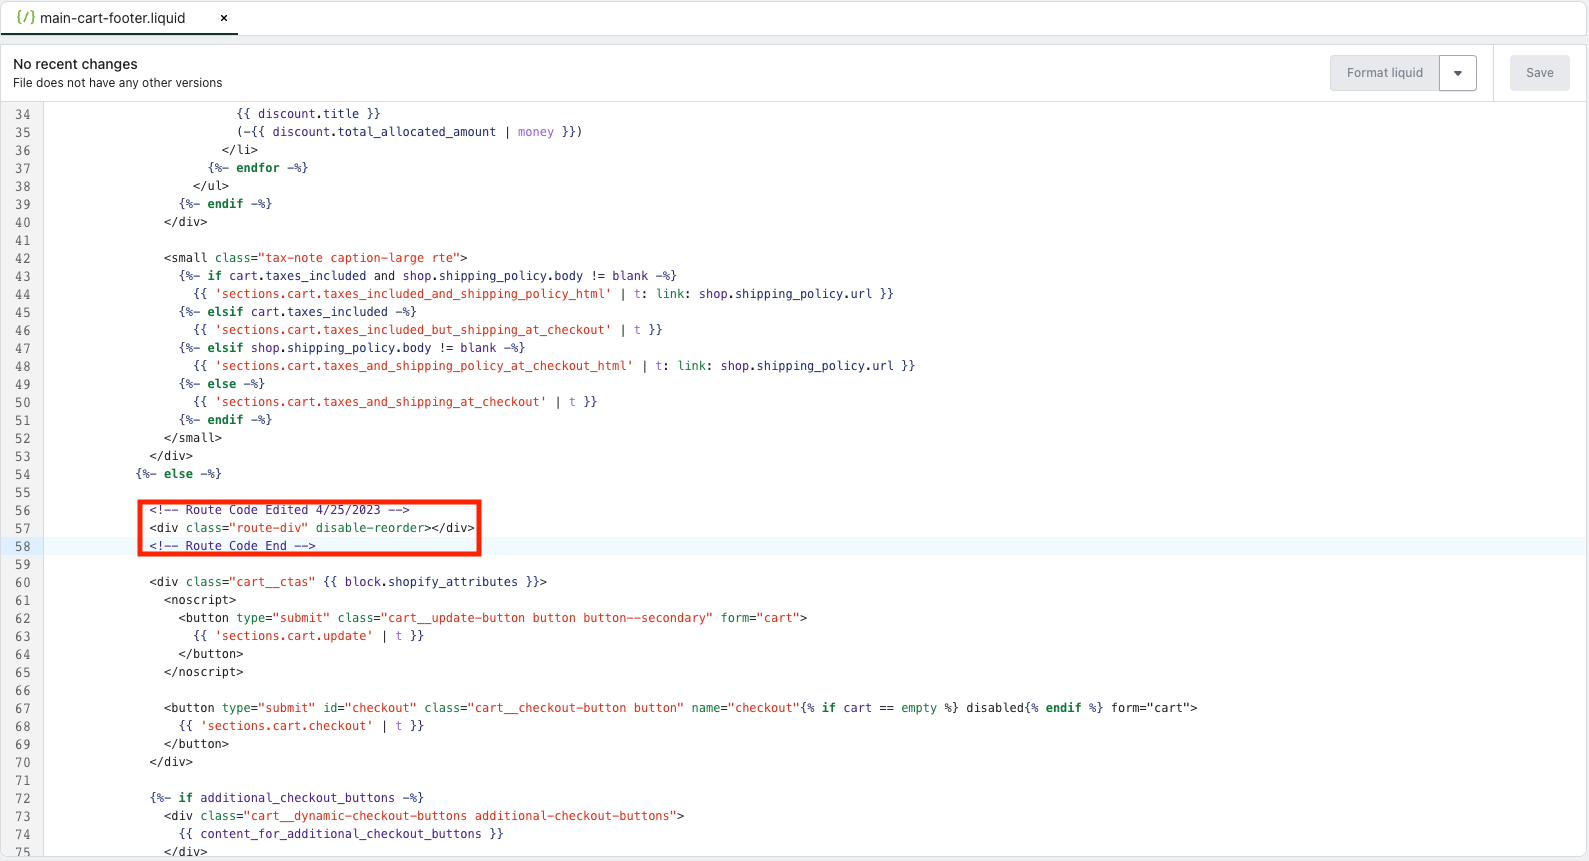
The code being used on the cart page is:
<div class="Swipe-div" disable-reorder></div>
This code will be inserted between the “{%- else -%}” and the “<div class="cart__ctas" {{ block.shopify_attributes }}>” as seen in the image above.
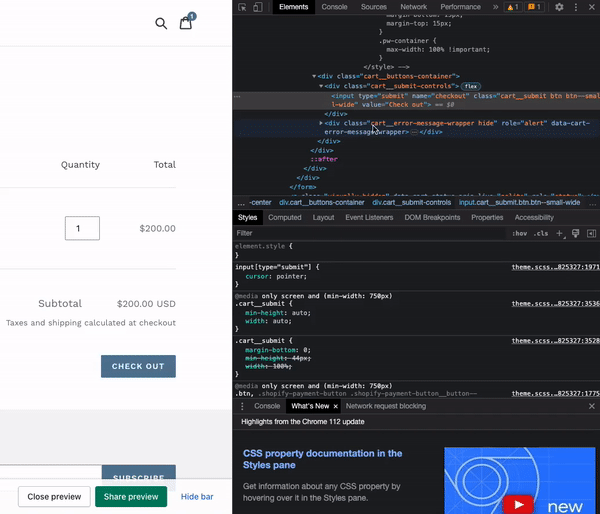
Header Cart (“cart-notification.liquid”)
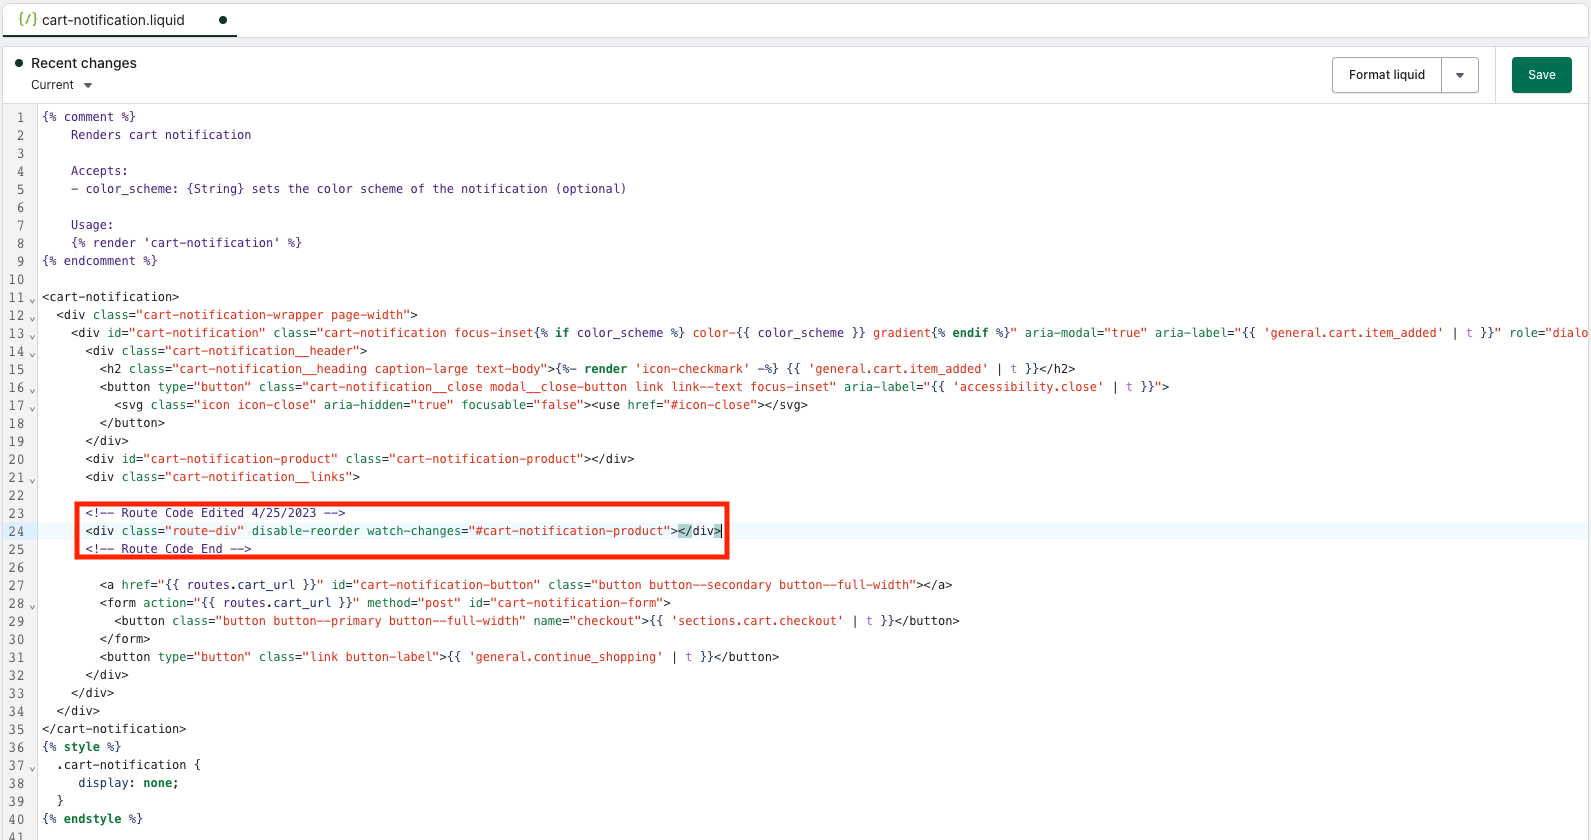
The code being used on the header cart is:
<div class="Swipe-div" disable-reorder watch-changes="#cart-notification-product"></div>
This code will be inserted between the “<div class="cart-notification__links">” and the “<a href="{{ Swipes.cart_url }}" id="cart-notification-button" class="button button--secondary button--full-width"></a>” as seen in the image above.
Need some help? Not to worry! All merchants have access to free, expert implementation from the Swipe team. You can use this form and our merchant support team will file a request on your behalf.


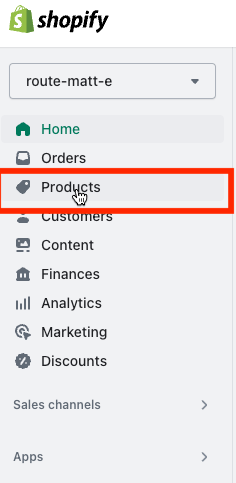
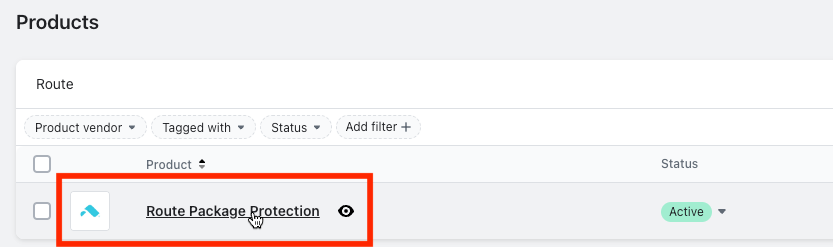
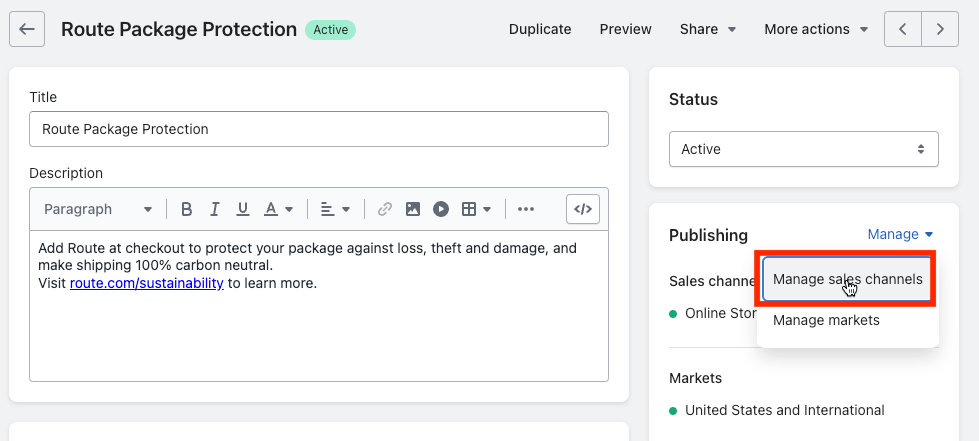
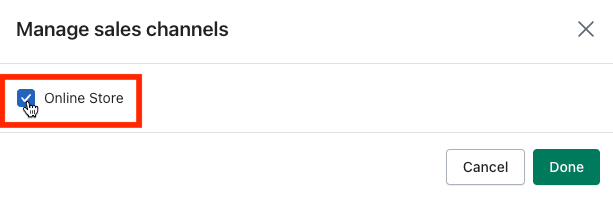
 1) Manage Swipe product availability in Shopify